A Very Windy Day
As the weather continues to turn, I have not been able to work as much outside as I normally would like to. But when I do, I try and make the exercise worth it. This last week I went to help our friend Mark at Hope Grows Farm to build a winter animal shelter in his pasture. He is bringing on a few ponies to winter with his donkey Gus, so we installed a shelter to help these animals in the pasture. This is a project Mark has wanted to do for years but hasn’t had the help or design to make it happen. My wife Celeste and Christopher built a smaller version of this for our pony Huckleberry last year, while I was freezing in the field on Fort Knox. So, we had a bit of understanding as to the way to proceed in this build.
The build was delayed a bit as we made sure to pick a sight that was relatively flat and approved by Marks loving wife. We also had to pick up some different panels than the ones I ordered online, but here is the basic brake down of the shelter. I used 9 pallets of two different sizes 4 of one and 5 of the other, 3 15’x4’ cattle panels, 12 8‘T-posts, a 30’x60’ blue tarp and lots of zip ties and 2 ½” screws. The overall build took between 2-3 hours to put up by two slightly broken soldiers. Gus’s continued investigations and the 45-50 mile an hour winds keeping things interesting during the build.

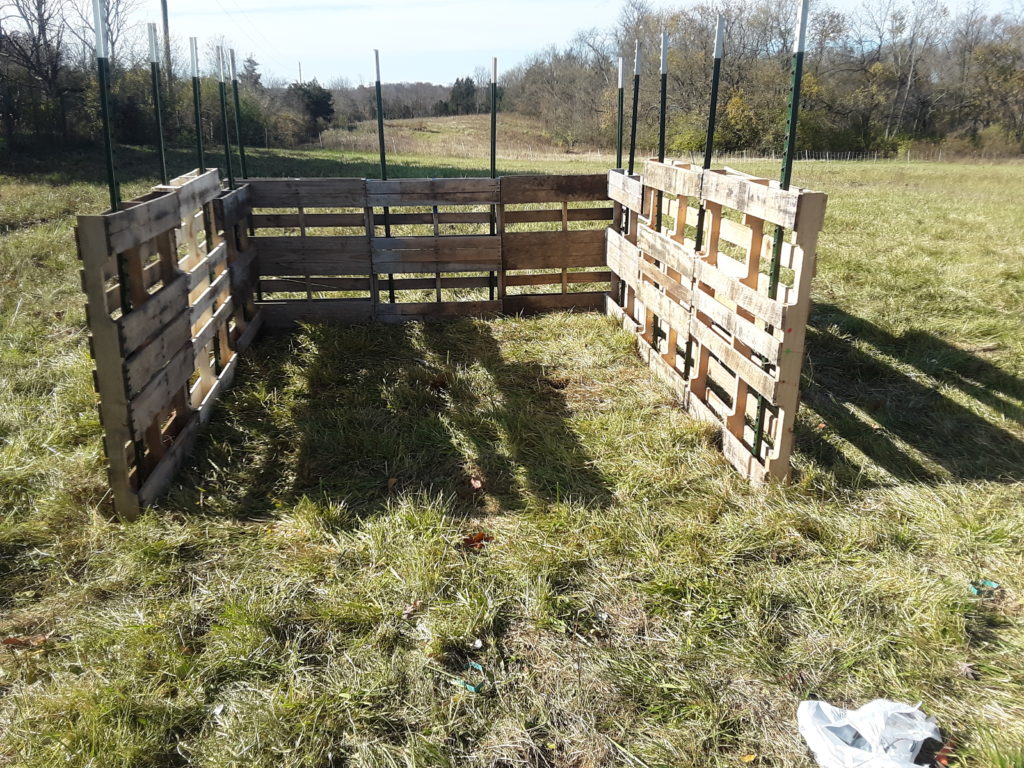
With the help of Marks tractor, we moved all the materials into his pasture and laid out the build as shown below. We placed three of the shorter pallets at the rear and then paired the remainder on the sides with a short and then two long ones respectively. This was to allow for a gradual increase in height from the back to the open front. We placed the back toward the natural flow of wind and bad weather to maximize the protection this would offer. The interior dimension were laid out at approx. 9’ wide and 14’ deep.

The rear three pallets were placed over 4 T-posts and the pallets were screwed together after they touched the ground to make them a solid wall as much as possible. The remaining pallets were placed in a similar fashion and were also screwed to the rear wall. The T-posts were emplaced so that the bumps on the flat side were facing in to help with the next step. Gus came by to check on us multiple times during this phase. We appreciated his insights and approval. I will admit that this was the most painful part for me. My arthritis in my should was screaming about halfway through pounding the T-posts in. It hasn’t shut up since then, but as Drill SGT Polk told me years “if an old guy like you starts a young man’s game, then he better be ready to have pain as his teacher”. Needless to say, I have started doing those exercises my doctor recommended years ago when we discovered the ailment.


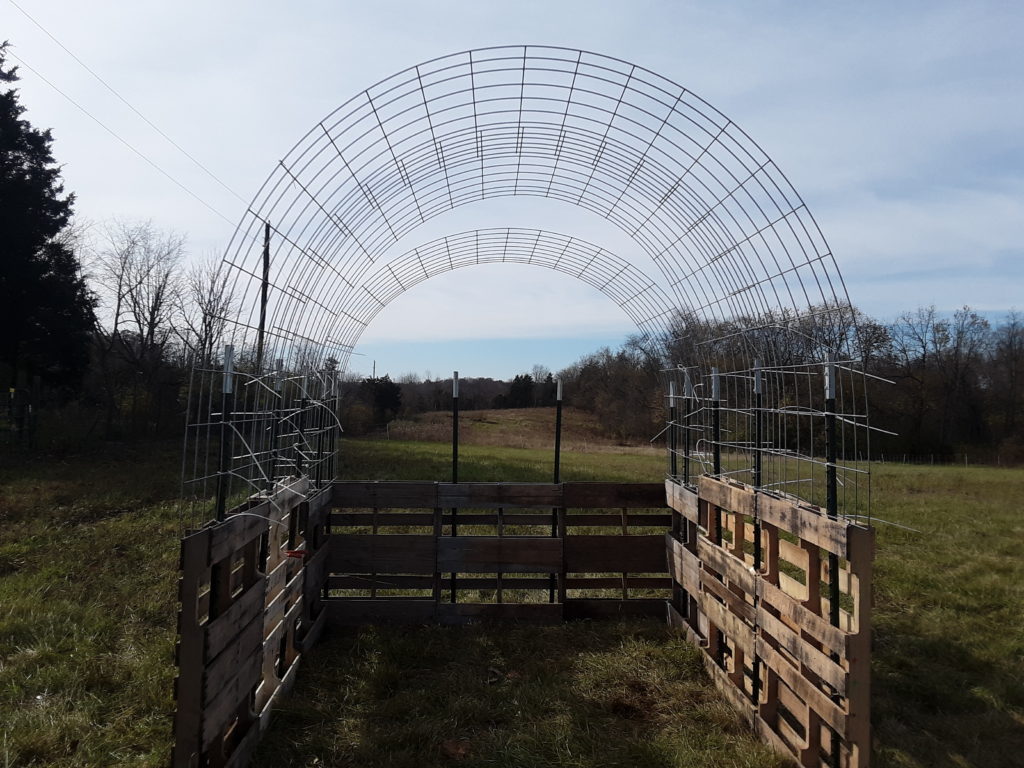
The rest of the project went up pretty quick. The T-post tops were used to zip tie the cattle panels in and raise the height of the shelter. The panels were layered as much as possible and screwed into the pallets where they touched.

After the tarp was in place, we zip tied it to the panels inside, screwed it into the pallets with washers on the outside, and then used twine to reduce the slack on the top. Gus seemed pleased with the end result (sorry I didn’t get a picture of that). And I headed home shortly after. This shelter should remain in place for years, with the tarp having to be replaced every few years. The only major thing I will do next time is place pool noodles or pipe insulation over the tops of the T-posts to reduce wear. We will keep you updated on how it is operating in the future.

The last part was hard only because Mark had to unload some hay and straw had just been delivered to another side of the farm. I ended up unrolling the tarp and tying the eye hooks together so we could pull the tarp over once Mark got back.

Lessons I learned from this experience: keep active so you have less pain; and continue to try new things to aid in living a full life. Deven Little
